Storage Volumes
How to set up a persistent volume with Kubeflow
-
Open the Kubeflow Central Dashboard and select a namespace to work on.
-
Click Volumes in the side panel.
-
Click + New Volume
-
In the New Volume settings, select the following parameters:
- Name: enter any name
- Volume size in Gi:
10(or as needed) - Storage Class:
standard - AccessMode:
ReadWriteMany
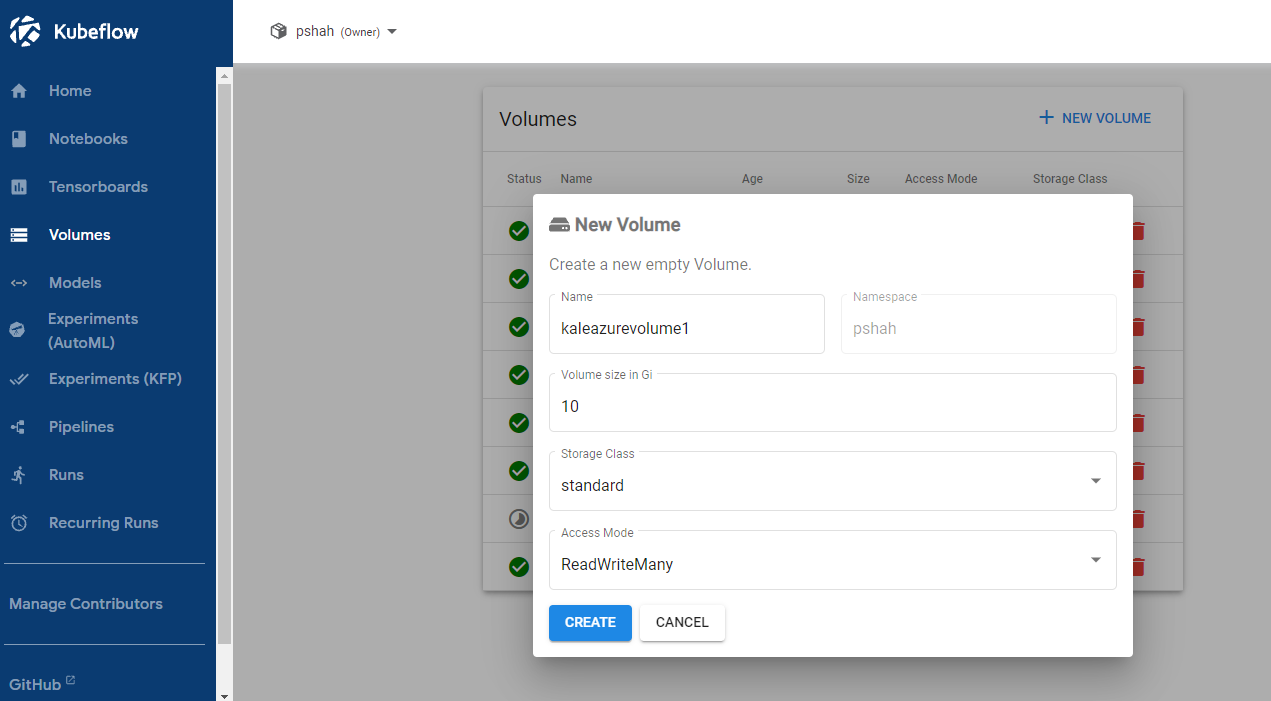 New volume settings
- Click Create.
How to set up a shared persistent volume
Use a shared persistent volume if multiple team members are running separate notebooks in Kubeflow and using the same files in a dataset.
First steps
Before starting to set up the volume, contact the AI Platform team and ask them to provision the necessary resources and configure them in the Azure subscription. You must supply them with the following information:
- Name of the project. For example,
Deli. - List of the full usernames or Azure Active Directory Group that should have access to the storage. For example:
haij@equinor.com,clbi@equinor.com,etim@equinor.comorAurora Developers. - If you own an AI Platform cluster, please supply the name of the cluster or public endpoint. For example:
deli12, ordeli.dev.aurora.equinor.com. If you do not have a working cluster yet, one will be provisioned for you.
- These steps only need to be carried out once. All new AI Platform clusters for this project will use the same configuration.
- For each user present in the provided list or Azure Active Directory Group, a Kubeflow profile will be created in the AI Platform cluster (See the page on multi-user isolation for more information about namespaces/profiles).
Best practices
- Teams should setup "shared-data-volume" (with "standard" storage type and "ReadWriteMany" access) under their shared project profile. This volume can be then mounted with multiple notebook servers by multiple people so that stored data can be shared among the team.
- On the shared data volume, create two folders:
codeanddata.- Under the
codefolder, create folders with each team member's Equinor short name. This is where each member can clone their GitHub repos and work on their own code once they mount the volume with their own notebook servers. - Shared team data can be stored under
datafolder. The directory structure can be determined by the team based on their needs.
- Under the
How to attach a shared volume to your notebook
To attach a shared volume to your notebook, follow these steps:
- Open the AI Platform site.
- Manually create a notebook server.
note
For details on how to manually create a notebook server, go to Browser-Based Notebooks (JupyterLab, VS Code, RStudio).
- In the Data Volumes section, click + Add exiting volume and set the following:
- a.) Type: choose the
Existingoption - b.) Name: use the
<PROJECT_NAME>-<SHORT_USERNAME>-azurefilename structure, for exampledeli-clbi-azurefile. Project and usernames must be in lowercase letters, the username does not include email extension, i.e.,@equinor.com. - c.) Mount Point: can be any value but it should be a path agreed upon by your team.
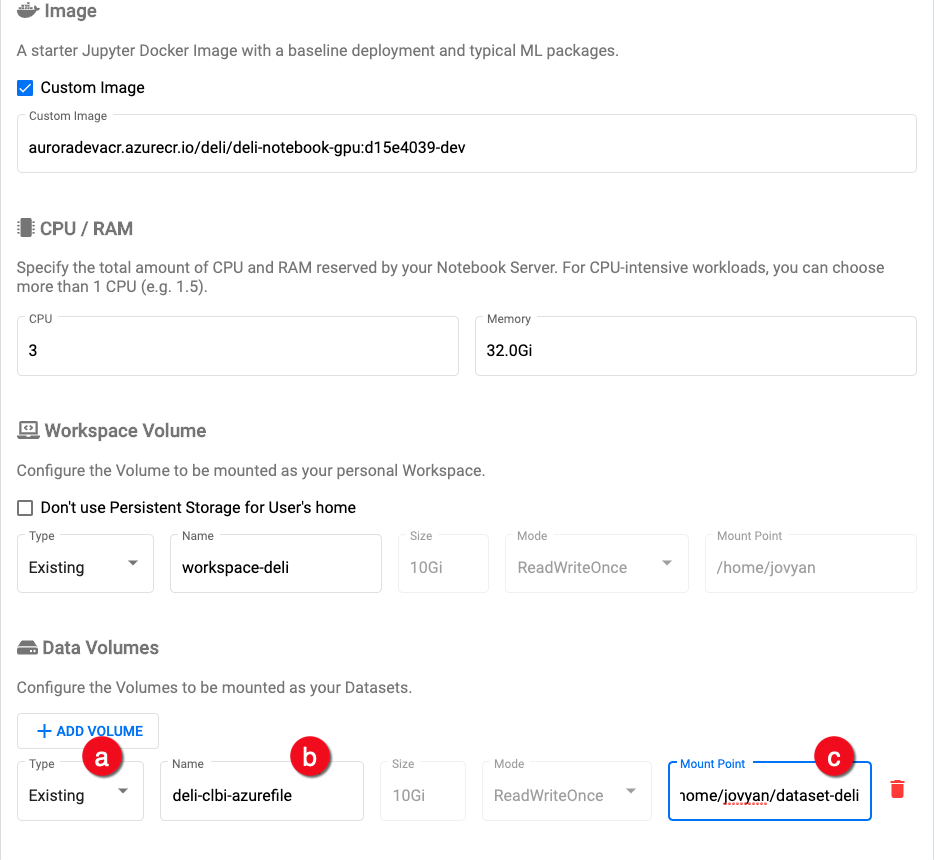 Data volumes settings
- Click LAUNCH. When the notebook server provisioning is complete, you should see an entry for your server on the Notebook Servers page.
- Click CONNECT to start the notebook server.
- After connecting to the notebook server, you should see the Jupyter dashboard interface and shared storage should be available under the Mount Point provided above.
How to set up a volume with AzureMount
AzureMount is a custom component that has been developed in house for Equinor.
This component is used to create a volume that is linked to either an AzureFile or AzureBlob store.
Microsoft documentation:
To create a link to your file share, do the following:
-
Get the Azure storage account's details.
- Open the Azure Portal.
- Go to Storage account > Security + networking > Access keys.
- Copy key and storage account name for use in the following steps.
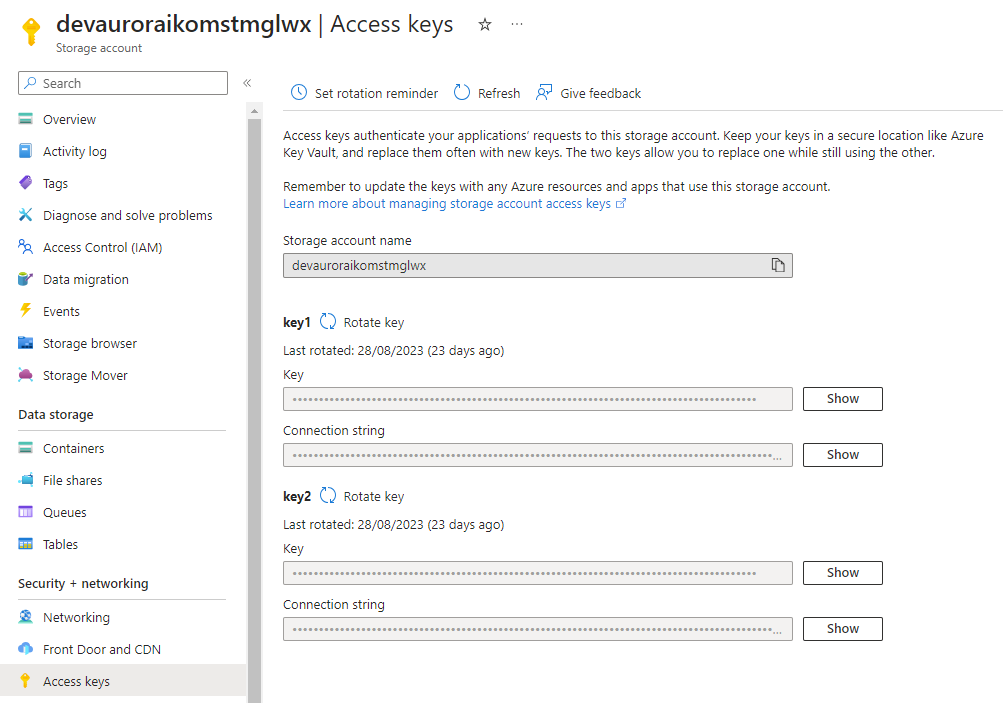 Azure storage account access keys
 -
In the Kubeflow UI main menu, go to the AzureMount component.
-
Fill in the details with the following information:
- Storage type: choose either Azure Blob or Azure File
- Share / Container name: container or share name within the storage account
- Name: Azure storage account name
- Key: access key obtained previously
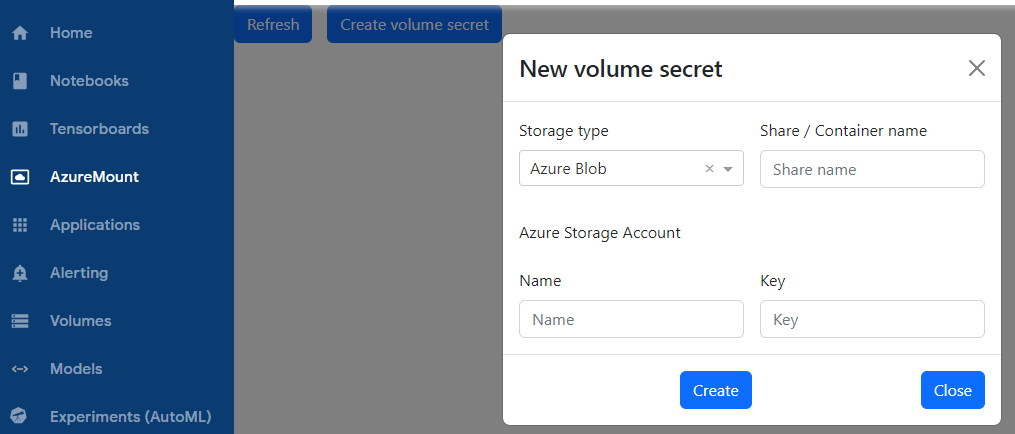 AzureMount component in Kubeflow